


Compiling: First you need to compile. You can do this by opening the folder in BlueJ (from the menu select Project->Open Non BlueJ..; then hit the Compile button). Or, you can compile in the terminal, as follows: Find the application called Terminal (Macintosh HD -> Utilities->Terminal), open it, and at the prompt, type:
cd ~/Desktop/Lab1-dots/
javac *.java
These are Unix commands. The first command goes to the right folder
(tilde stands for your home directory).
The second command compiles the .java files and creates
.class files. You may notice that for SolutionDots
you do not have the .java file, only it's compiled version
SolutionDots.class (or this would not be a lab, right?).
Running in BlueJ: Right-click (on Macs with single-button mouse: CTRL+click) on the Dots icon, then select the main method.
Running from the command line: In the terminal, type:
java -ea Dots
The -ea flag enables assertions. We will (if we have not already) talk about assertions in class. It is not an error if you don't run with assertions enabled; assertions help debugging and are a good programming practice because they can catch errors earlier.
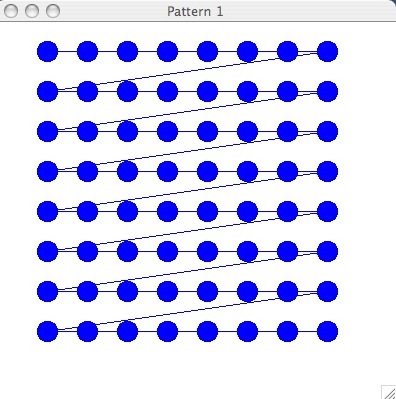
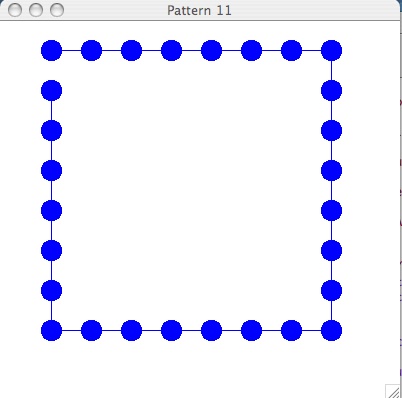
By inspecting the method drawPattern in the source file Dots.java, you will see that the shape of Pattern 1 is controlled by the following nested loop structure found the first block of the switch statement in drawPattern:
switch (pattern) {
case 1:
      for (row = 0; row < 8; row++)
           for (col = 0; col < 8; col++)
                 board.bigDot(row, col);
      break;
As this nested loop executes, method bigDot automatically
connects each dot to the next dot that is drawn. You may ask: "Why are
most of the connections horizontal lines?" The answer lies in the
order in which the loops are nested. The row loop is the outer loop
and the column loop is the inner loop. This means that, for each value
of the row index, an entire cycle of the column loop must be executed.
Therefore, for each row, the inner column loop draws a dot in column
0, then in column 1, and so on through column 7. This explains why the
dots in each row are connected by a sequence of horizontal lines. When
a given row is finished the last dot drawn is in column 7. The next
row begins with a dot in column 0. This explains the diagonal lines
from upper right to lower left which connect successive rows.
The method bigDot(row, col) arranges the details of drawing the dots and making the lines which connect successive dots. Since these details are not the main focus of this exercise, we will not discuss them here.
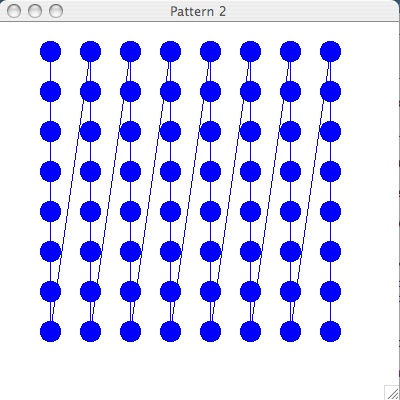
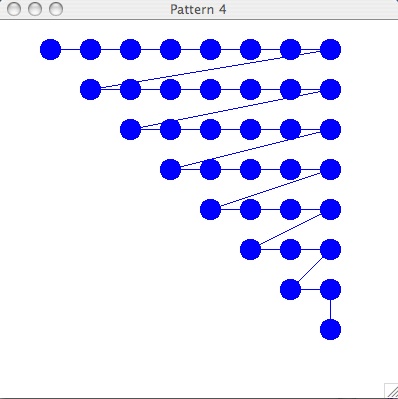
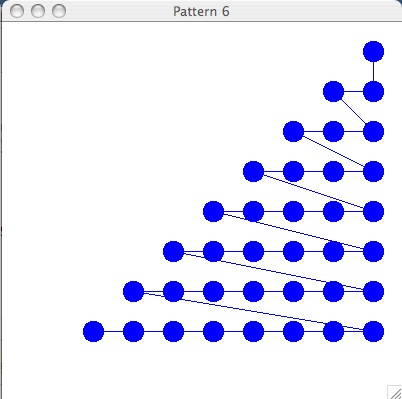
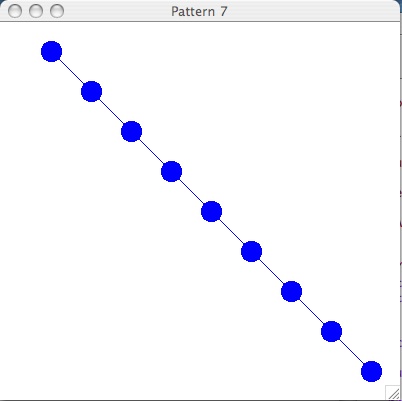
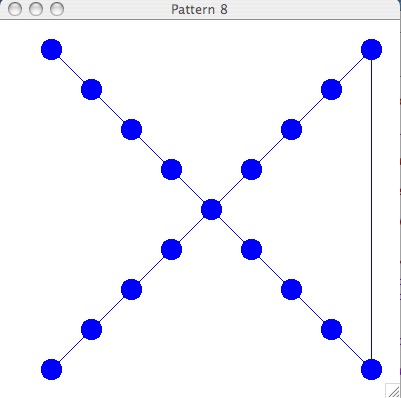
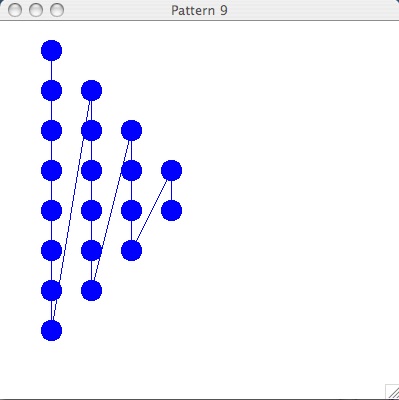
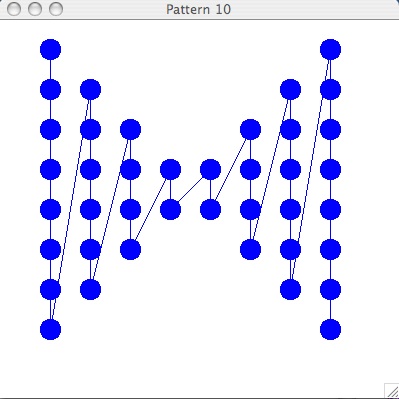
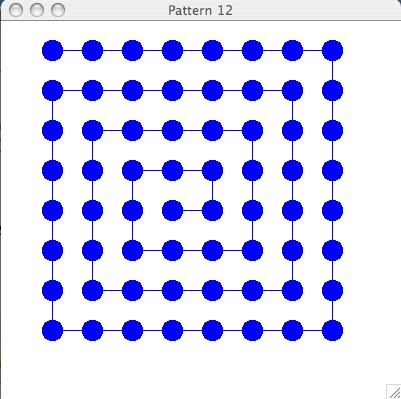
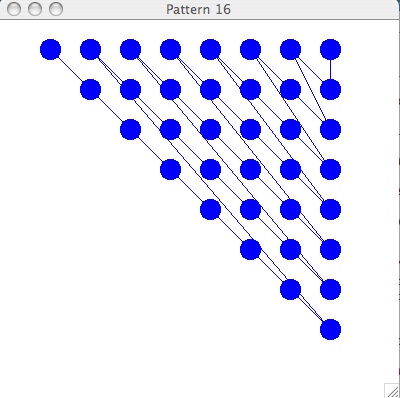
Your task in this exercise is to draw as many of the remaining 15 dot puzzles as you can using appropriate loop structures. Each puzzle requires giving a new twist to the loop structures. For example, in puzzles 3 to 6, you must figure out how to replace the constants 0 and 8 in the inner loop by expressions which depend on the row index. In some of the later puzzles, you will need a sequence of loop constructs since a single nested loop structure will not be sufficient. In a few cases, you will need an extra loop variable besides row and col.
You should insert the code for the remaining 15 patterns as blocks in the switch statement of drawPattern. See the location in the file marked with the comment:
Enter additional pattern solutions belowWhen your solutions are entered in the switch statement, the driver routine userLoop will enable you to interactively test all of the patterns and compare them against the solutions.
Some ground rules:
Points can also be subtracted.
Please note: while this lab is pretty fun to do, getting a 95+ score is difficult.
If you learn nothing else from this course I hope you will learn how to debug programs well. Traditionally there are two ways to debug programs which complement each other. The most common method for involves the use of print statements. For example, in this program you might put a print statement after each bigDot statement. The obvious thing to do would be simply to print out the values of (row, col) in the calls to bigDot. This would be useful in the sense that it would give you the exact order that things are called.
The other thing you could do is learn how to use the BlueJ Debugger. You can find links on the class website. If you learn to use the Debugger effectively (and it isn't difficult) it will save you many hours of work during the semester.
I'm amazed by the number of times we hear questions of the following sort: "what would happen if I did . . .". You have a computer in front of you. Try it. Further, you are more likely to remember the answer if you get it yourself.